TIPS ON HOW TO USE THE APP
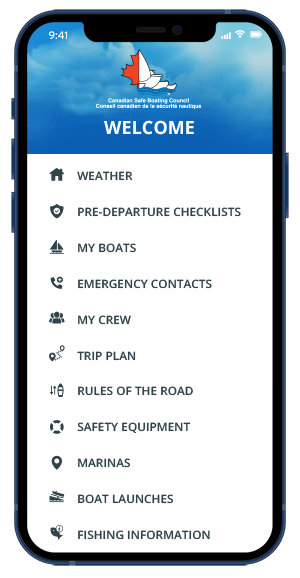
Weather To Boat will become your “Boating Go To” App. Find all the key information you need for your boating adventure in this one app. Create and file your trip plan, verify the required safety equipment, check the weather, refresh your memory on the rules of the road and use the pre-departure checklists to ensure you have everything you need.
Learn more about specific features with our tutorials below.
PLEASE NOTE:
- Trip Plan notifications are ONLY sent within Canada
- Ensure your notifications are turned ON for the Weather to Boat App.
- You must create an account to access and use the Trip Plan system which includes:
- Trip Plan
- My Boats
- My Crew
- Emergency Contacts
By creating an account, you can file an electronic trip/sail plan with emergency contact alerting. You will be able to save the key information about your boat(s), emergency contacts and details on your usual crew members, including yourself, to make each new trip/sail plan filing quick and easy.
Once you have created your account and have logged in, complete the sections My Boats, My Crew and Emergency Contacts.
How the Emergency Contact Alerting System Works
**It is important that you ensure you have input correct and valid email addresses and mobile phone numbers to ensure the alerts are received.
What the App User Receives
3 push notifications to your phone before your Return Time:
15 minutes before your Return Time: "Your trip should be ending in 15 minutes”
10 minutes before your Return Time: "Your trip should be ending in 10 minutes”
5 minutes before your Return Time: "Your trip should be ending in 5 minutes – please close your Trip Plan to ensure your emergency contact is not notified unnecessarily”
*You will receive 1 FINAL push notification to your phone before your Report In Time:
15 minutes before your Report-In Time “ATTENTION!! Your Trip Plan has NOT been closed. In 15 minutes, your Emergency Contact will be notified that you are overdue, and they will be instructed to initiate Search and Rescue response. Please close your Trip Plan IMMEDIATELY before Search and Rescue activities commence.”
What the Emergency Contact Person Receives
Once the User clicks to start the Trip Plan – the Emergency Contact listed in the Trip Plan will receive an email which states:
“…Username…has created a Trip Plan on the Weather to Boat App and has listed you as their Emergency Contact. All trip details and crew details are given below. Please take a moment to review and keep it readily accessible. You will receive an SMS notification with further details ONLY if they have not returned by their scheduled Report In time and the Trip Plan they created has not been closed.”
If the App User closes / ends their Trip Plan before their scheduled Report In time
The Emergency Contact will NOT receive further contact.
If the App User does NOT close / end their Trip Plan before their scheduled Report In time
The Emergency Contact will receive the following SMS text message to their phone:
“The Trip Plan you are listed as the Emergency Contact on is now overdue. Please make contact with the boater and/or crew to ensure they have returned safely. If you can NOT make contact with them, please call the SAR Rescue Centre number listed in the email you received and provide them with all necessary trip details.” Tap the link for the trip plan details” (link to trip plan details)
Creating a Trip Plan
Page 1 – Trip Plan Details
Time Zone: Choose your time zone from the dropdown menu
Select Location: This field will auto populate based on your location. It can be changed from the dropdown menu.
Please call SAR Rescue Centre: This field is a locked field and will auto populate with the SAR Rescue number based on your location.
Departure Site: Fill in the location you will be starting from – be as specific as you would like.
Departure Date: Choose your date from the dropdown menu.
Departure Time: Choose your time from the dropdown menu.
Final Destination: Fill in the location you will ending your trip at – be as specific as you would like.
Return Date: Choose your date from the dropdown menu.
Return Time: Choose your time from the dropdown menu.
If We Don’t Report in by: ** Please make your report in time at least one hour after your expected return time to allow for unforeseen delays in your trip and premature search and rescue alerting.
Report in Date: Choose your date from the dropdown menu.
Report in Time: Choose your time from the dropdown menu.
Total People on Board: Fill in the total number of people who will be on board for your trip. *Be sure to include yourself in this number.
User Emergency Contact: Click here and the list you created in “Emergency Contacts” will appear – choose the one you want for this trip – they will be the one who receives the email with your Trip Details once you start your trip – and also the one who receives an emergency SMS alert if you have not returned or closed your trip by your expected Report in Time.
My Boat: Click here and the list you created in “My Boats” will appear - choose your boat.
Details of Proposed Route: This is the area to fill in any pertinent information about your trip, stops along the way.
Click Save & Next to proceed to Page 2
Page 2 – People on Board
My Crew: Click on this button and the list you created in “My Crew” will appear
*Make sure you choose the same number of crew members as number of people on board you input on Page 1 …and remember to include yourself in this number.
*If you want to include a crew member who is not already in your “My Crew” list, there is no need to go out of your Trip Pan to add them in. You can add all their details right here – and by clicking Save & Next they will automatically be saved in your My Crew list.
*Once you have chosen your crew, you can edit each member with specific details for that particular trip, including PFD colour, clothing colours or any medical conditions they may have.
Click on Crew 1 to open their details.
Click the Edit icon – input your information and click “Update”.
Click Save & Next to proceed to Page 3 or Previous to go back to Page 1
Page 3 – Gear Carried Onboard
Signalling Devices: Click on the devices you have onboard.
Communications:
VHF Radio Call Sign: Your “My Boat” name will auto-populate this field – you can also edit this field.
Cell Phone Number: This field will auto-populate with your cell phone number from your account.
Satellite Phone: Click on this field if you have one onboard and type in your number.
Equipment:
First-Aid Kit: Click if you have on onboard.
Water / Food for (x) days: Click and enter the number of days you have water/food for.
Click Submit to save your trip plan to your account or Previous to go back
Important Information Once Your Trip Plan Has Been Added to Your Account
You will be able to start your trip plan by clicking the “Start Trip” button within one hour of your departure time.
You can Edit your trip plan details anytime before you click the “Start Trip” button.
Once the trip plan has been “started” you will NOT be able to change any of the information in it.
If you want to extend your trip once the trip plan has been started, or you want to change any of the information, please close/end the current Trip Plan by clicking the “End Trip” button.
You can then create a NEW Trip Plan with your updated information.
**ALWAYS ensure that you close/end your trip as soon as you have returned safely to avoid unnecessary SAR Rescue activities commencing.
It is important to note that there is only ONE version of the app to download from the App stores.
The App will automatically download in English, even if your phone is set to the French language.
When you first open the App, your home screen will be your geo-referenced local weather screen in English.
If you wish to view the App in French, it is a quick swipe to the right – or – tap the menu button in the top left corner to take you to the menu screen.
Scroll down to the Language option and select it.
Select French and the app will now be viewed in French.
**To use features such as ‘My Boats’, ‘Emergency Contacts’, ‘My Crew’ or ‘Trip Plan’, you must first create an account which will be used to store all your relevant information.
First, select Sign Up at the bottom of the Login Screen to create your account.
Input your first and last name.
Select your gender from the dropdown menu. **This information is for SAR Rescue identification purposes only.
Input your province of residence
Input your mobile phone number
Input your Email Address. **Which will be your User Name
Create and Input your Password
**Your password must be a minimum of 8 characters total and requires at least one lowercase letter, one uppercase letter, one digit, and one special character.
Click the Sign-Up button
Your account has now been created successfully and you can close this message.
Now you’ll be able to Login using your e-mail and password.
Please accept the license agreement and Privacy Policy and then select the Login button.
You are now ready to use trip planning with Emergency Contact Alerting!
If you’d like to Delete your account, you must first be logged in.
Select the “Edit Profile” button at the top of the Menu Screen.
Scroll to the bottom of the screen.
Select the “Delete Account” button.
Confirm delete account by tapping Yes.
Your account has now been deleted successfully and you can close the screen and go back to the Menu.
In order to update your account information, you must first ensure you are logged in. **It is important to note that you can NOT change your e-mail address.
If you’d like to use a different e-mail you will need to logout and create a new account with your new e-mail address.
You will need to enter in all your relevant information again for the new account.
You can delete your previous account if you wish.
Select the “Edit Profile” button at the top of the Menu Screen.
Input any of the changes to your information you wish to make and click the “Update” button.
Your profile has now been updated successfully and you can close the message and go back to the Menu.
To use the Emergency Contacts feature, you must first create an account. Please refer to the “Create an Account” video and description for further information.
This is where your list of Emergency Contacts will be stored.
Here you can add additional contacts, edit current contacts or delete any contacts you no longer wish to have and there is no limit to how many contacts you can have saved.
**Be sure to advise your contacts before you add them to your account so they will know what the notifications mean.
Click on the “Add Contact” Button
Contact Name: Enter their first and last name
Email: Enter their email address
**Please ensure this information is accurate as it will be used to send alerts to your contact.
Mobile Number: Enter their mobile phone number
**Please ensure this information is accurate as it will be used to send alerts to your contact.
Relation: Enter their relation to you ex. spouse, parent, friend, co-worker etc.
Click on the “Add Contact” Button and your Emergency Contact has now been saved successfully to your account and you can close this message.
To use the My Boats feature, you must first create an account. Please refer to the “Create an Account” video and description for further information.
Select the “Add Boat” button.
This is where you will enter all the relevant information for your boat. Simply fill in the fields that apply to you and your boat.
Please be as detailed as possible as this is the information that Search & Rescue will use to try to locate you.
Boat Name: What you usually call your boat. Ex: Sea Breeze, Seas the Day etc.
Boat Type: Select either Power Boat, Sailboat or Paddle Craft from the dropdown menu.
Boat Style: Input the style of boat you have. Ex: bass boat, bowrider, dinghy, pontoon etc.
Boat License / Registration #: Input your information – this is not a mandatory field you can come back at add/edit at a later time if you don’t have it close at hand.
Boat Hull Colour: The colour of your boat hull.
Boat Top Colour(s): The colour that would be seen from above looking down on your boat – for SAR Rescue identification purposes.
Boat Trailer: Yes or No
Trailer License Number: Enter if applicable
Tow Vehicle: Yes or No
Vehicle Year: Enter if applicable
Vehicle Make and Model: Enter if applicable
Vehicle Colour: Enter if applicable
Tow Vehicle License #: Enter if applicable
Once complete, select the Save Button.
Select OK and your boat has been saved to ‘My Boats’.
You can update your boat details at anytime by selecting the edit button.
To use the Crew Members feature, you must first create an account. Please refer to the “Create an Account” video and description for further information.
**Be sure to FIRST add yourself as a Crew Member to your account - and then you can add and store information for the people you usually go boating with.
Click on the “Add My Crew” button.
Name: Crew members name
Gender: Select from the drop-down menu. **This information is for SAR Rescue Purposes Only.
Age: Enter applicable information
Mobile Number: Enter applicable information. **You can leave this field blank if the crew member is a child or someone who does not own a cellphone.
Medical Conditions: Enter any relevant medical conditions this crew member may have.
Click on the “Save” button to save your crew member details.
You can also add additional crew members or edit details of crew members previously saved to your account or delete crew members that you no longer wish to have.
You can then either swipe right or click on the menu icon at the top left of the screen to go back to the Menu.